Disclosure: We may earn a commission from helpful, relevant links in our content. No cost to you. See our privacy policy.
Dog parks, long walks, frisbee games – owning a dog is pure joy until it’s not.
Think of the panic and helplessness when Rex gets a paw injury or Daisy starts choking on a toy. These events can turn our joyful moments into stressful situations quickly.
But here’s the good news – you can prepare for these unexpected incidents. This guide is about creating your very own dog first aid kit, a tool that will help you handle emergencies like a seasoned vet tech. Stick with us, and you will learn the essentials, easily.

Why Every Dog Owner Needs a First Aid Kit
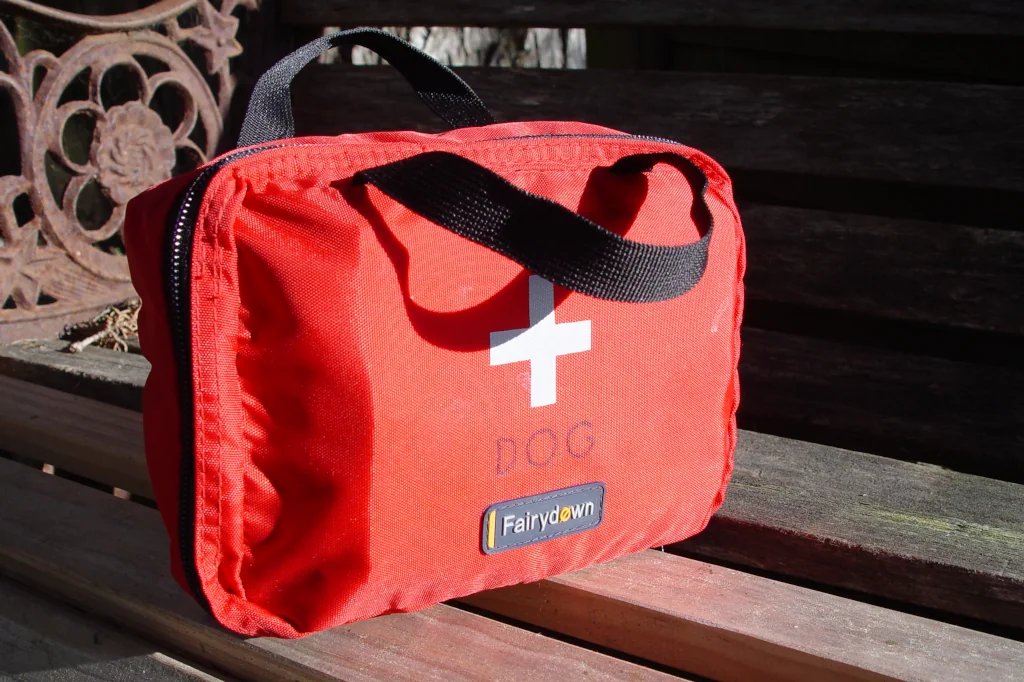
One moment your dog is happily playing, the next, they’re limping and whimpering. In these situations, a dedicated dog first aid kit can be a lifesaver.
While it might seem like a human first aid kit would suffice, it’s crucial to know that some items and medications aren’t suitable or safe for dogs. Having a dog-specific first aid kit ensures you’re equipped with the right tools and supplies, should a pet emergency occur.
The goal is to provide initial care and stabilize your pet until you can reach professional help. By doing so, you not only prevent further injury but also give your pet the best chance at a speedy recovery. Plus, it gives you, the pet parent, peace of mind knowing you’re prepared for emergencies.
So, why not take a proactive step for your dog’s health and safety? Let’s explore what you should include in this kit.
What Essential Items Should Be in Your Dog’s First Aid Kit?
1. Contact Information
The top priority in your kit should be a list of essential contact numbers. This includes your vet, local animal hospital, and the Poison Control Center (888-426-4435).
You might think, “Isn’t this in my phone already?” Yes, but in an emergency, having these numbers in your kit can save you precious minutes.
2. Medical Records
A copy of your dog’s medical history, including vaccinations and any known allergies, should be easily accessible in your kit. It provides invaluable information to any vet unfamiliar with your pet.
3. Dog-Specific Bandages
Standard human bandages don’t always adhere well to a dog’s fur. So, opt for self-cling bandages. They stretch and stick to themselves, not your dog’s fur, making them a more comfortable and effective choice.
Instead of standard human bandages, consider 3M Vetrap Bandaging Tape or PawFlex Medimitt Outdoor Dog Bandage, which adhere well to a dog’s fur and are designed for comfort and effectiveness.
4. Tweezers and Scissors
For splinter removal or hair trimming around a wound, tweezers and a pair of blunt-end scissors are indispensable. The Resco Deluxe Dog Nail Clippers & Trimmer include both a nail trimmer and a cuticle pusher, which can double as a tweezer for splinter removal.
5. Digital Thermometer
A dog’s temperature can tell a lot about their health. A dog-specific thermometer is designed for rectal use, providing the most accurate reading. And remember, a dog’s normal temperature is higher than a human’s, usually between 101 and 102.5 degrees Fahrenheit.
Go for the iProven Pet Thermometer, which is a dog-specific thermometer designed for rectal use, providing the most accurate reading.
6. Antiseptic Wipes
To clean a wound, antiseptic wipes are a must. They’re designed to cleanse without stinging, reducing discomfort for your pet. The Douxo S3 PYO Pads are a topical brand, pet-safe, recommended by vets, and can be effectively used for this purpose.
7. Styptic Powder
Styptic powder stops bleeding quickly, making it a crucial item when dealing with nail trimming accidents. This is an often overlooked item in a dog first aid kit, but can be a game changer in a bleeding emergency.
A high-quality styptic powder is vital. I’ve always used Kwik Stop Styptic Powder, which includes benzocaine to quickly numb pain, allowing you to care for your pet’s wounds more effectively. A lot of powders take a lot to stop the bleeding, but this one does the job very well, and works instantly.
8. Dog-Safe Pain Reliever
Human pain relievers can be toxic to dogs. Always have a canine-safe alternative on hand. Consult with your vet for appropriate brands and dosages.
9. Tick Remover Tool
Ticks can cause serious illnesses like Lyme disease. A tick remover tool can safely and effectively remove the entire tick, reducing these risks. The Ticked Off Tick Remover is a simple yet a highly useful tool that can safely remove the entire tick, reducing these risks.
10. Saline Eye Solution
To wash out debris or irritants from your dog’s eyes, a saline solution is perfect. Make sure it’s labeled as safe for eyes.
There are many options out there, but I’ve found that a Burt’s Bees for Dogs Natural Eye Wash is made with natural ingredients and is free from harsh chemicals and irritants, making it a gentle and effective choice for cleaning your dog’s eyes.
11. Muzzle or Soft Cloth
Even the gentlest dog might bite when in pain. Having a soft cloth to use as a makeshift muzzle is crucial to keep both you and your pet safe during treatment.
The Baskerville Ultra Muzzle offers a comfortable fit while ensuring safety. It’s designed to allow dogs to drink and pant, thereby reducing stress and fear.
12. Emergency Blanket
If your dog goes into shock, they might need help maintaining their body temperature. An emergency foil blanket takes up little space but can be invaluable in a crisis.
The Swiss Safe Emergency Mylar Thermal Blankets are compact yet effective in retaining heat. Their lightweight and versatile design makes them easy to include in any first aid kit, ensuring your pet stays warm in a crisis. These are effective for both dogs and humans in certain emergency situations.
By stocking these essentials, your dog’s first aid kit will be a powerful tool in tackling unexpected health emergencies.
How to Assemble a Basic First Aid Kit for Your Dog?
Assembling a dog first aid kit might sound intimidating, but it’s easier than you think. Let’s break it down into simple, manageable steps:
Step 1: Choose the Right Container
Start with selecting a container for your first aid kit. It should be durable, easy to open, and have compartments for organizing your items. A plastic toolbox or fishing tackle box would work well.
Step 2: Gather the Essentials
Using the list from our previous section, begin to gather all the essential items. Check off each one as you add it to your container. Remember, these items should be exclusively for your pet. Don’t borrow from your home supplies, as you may forget to replace them.
Step 3: Arrange Items Thoughtfully
Organize your items in a way that makes sense to you. For instance, you can group items by use: wound care items together, emergency items together, etc. The goal is to easily find what you need in an emergency.
Step 4: Add Personalized Items
Think about your dog’s specific needs. Do they have a certain medication they take regularly? Do they have a preferred type of treat that can help calm them down? Add these personalized items to your kit.
Step 5: Keep It Accessible
Store your first aid kit in an easily accessible place. It won’t help if you can’t find it when you need it most. And remember, it should be out of your dog’s reach to prevent accidental ingestion of any item.
Step 6: Maintain Your Kit
Every few months, check your first aid kit. Replace any used or expired items. If your pet’s medical condition changes, update their records and add any necessary new items.
With these steps, you’re now ready to assemble a first aid kit that would make any vet proud. The peace of mind knowing you’re prepared for emergencies is worth the effort.
Suggested read: Dog Poisoning Signs, Steps & Action to Take
Keeping Your Dog’s First Aid Kit Ready for Emergencies
Now that you’ve assembled your dog’s first aid kit, it’s vital to keep it ready for emergencies. Here’s how:
- Check Regularly. Inspect your kit every three months. Ensure everything is in working order and hasn’t expired. This regular check will also keep you familiar with the kit’s contents.
- Keep it Visible. Store the first aid kit in a place that’s easily accessible in emergencies but out of reach of curious pets.
- Update Medical Records. Whenever your dog visits the vet, update their medical records in the first aid kit. This is especially important if there have been changes in vaccinations, allergies, or general health.
- Educate Yourself. Understanding how to use the items in your first aid kit is as important as having them. Consider taking a pet first aid course, either online or in-person. It’s an investment in your pet’s safety and your peace of mind.
By following these steps, you can ensure your dog’s first aid kit is always ready to deal with emergencies. If you’re interested in expanding your knowledge of the basics of dog emergency preparedness, check our guide on performing CPR on your dog.
FAQs
Why is a dog’s first aid kit different from a human’s?
A dog’s first aid kit differs from a human’s because dogs have specific needs and sensitivities. For example, a dog thermometer is used rectally for more accurate readings, and some human medications can be harmful to dogs, such as Xanax, Valium, Ibuprofen, and Aspirin.
How often should I replace items in my dog’s first aid kit?
Items in your dog’s first aid kit should be checked every three months and replaced if they’re used, damaged, or expired. This doesn’t have to take a lot of your time, unless you used some items a lot.
Are there any dog-specific medications to include in the first aid kit?
Yes, dog-specific medications like canine-safe pain relievers, prescribed regular medications, and styptic powder for quick bleeding stoppage are crucial inclusions in a dog’s first aid kit.
Can I take my dog’s first aid kit on an airplane?
Yes, you can typically take your dog first aid kit on an airplane, but always check with your airline for any restrictions, particularly regarding medications and sharp objects like scissors or tweezers. You may need to pack these items in checked luggage.
Alex, a passionate animal lover, has experience in training and understanding animal behavior. As a proud pet parent to two dogs and three cats, he founded AnimalReport.net to share insights from animal experts and expand his knowledge of the animal kingdom.


